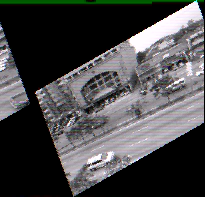
Thursday, February 25, 2010

Video - Hough Transform

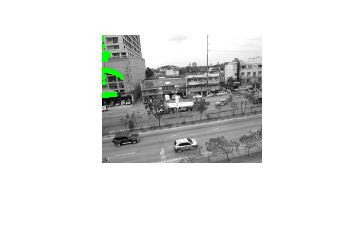
The hough function implements the Standard Hough Transform (SHT). The Hough transform is designed to detect lines, using the parametric representation of a line:


rho = x*cos(theta) + y*sin(theta)


The variable rho is the distance from the origin to the line along a vector perpendicular to the line. theta is the angle between the x-axis and this vector.
The hough function generates a parameter space matrix whose rows and columns correspond to these rho and theta values, respectively. The houghpeaks function finds peak values in this space, which represent potential lines in the input image.
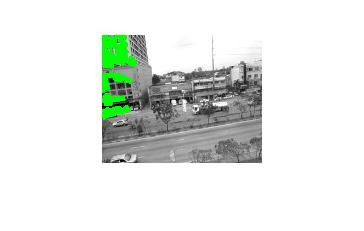
The houghlines function finds the endpoints of the line segments corresponding to peaks in the Hough transform and it automatically fills in small gaps.

The code:

clear all
close all
clc;
disp('Testing Purposes Only....');
%fin = 'sampleVideo.avi';
fin = 'smallVersion.avi';
fout = 'test2.avi';
avi = aviread(fin);

% Convert to RGB to GRAY SCALE image.
avi = aviread(fin);
pixels = double(cat(4,avi(1:2:end).cdata))/255; %get all pixels (normalize)

nFrames = size(pixels,4); %get number of frames
for f = 1:nFrames
pixel(:,:,f) = (rgb2gray(pixels(:,:,:,f))); %convert images to gray scale
end
rows=128;
cols=160;
nrames=f;
for l = 2:nrames

%edge detection
edgeD(:,:,l) = edge(pixel(:,:,l),'canny');
g(:,:,l) = double(edgeD(:,:,l));

%subtract background
d(:,:,l)=(abs(pixel(:,:,l)-pixel(:,:,l-1))); %subtract current pixel from previous

%convert to binary image
k=d(:,:,l);
bw(:,:,l) = im2bw(k, .2);
bw1=bwlabel(bw(:,:,l));

[H,theta,rho] = hough(edgeD(:,:,l));

P = houghpeaks(H,5,'threshold',ceil(0.1*max(H(:))));
x = theta(P(:,2));
y = rho(P(:,1));
lines = houghlines(edgeD(:,:,l),theta,rho,P,'FillGap',5,'MinLength',7);
imshow(pixel(:,:,l)); hold on;
max_len = 0;
for k = 1:length(lines)

xy = [lines(k).point1; lines(k).point2];
plot(xy(:,1),xy(:,2),'LineWidth',2,'Color','green');
% Plot beginnings and ends of lines
plot(xy(1,1),xy(1,2),'x','LineWidth',2,'Color','yellow');
plot(xy(2,1),xy(2,2),'x','LineWidth',2,'Color','red');
len = norm(lines(k).point1 - lines(k).point2);

if ( len > max_len)
max_len = len;
xy_long = xy;
end
end

% highlight the longest line
plot(xy_long(:,1),xy_long(:,2),'LineWidth',2,'Color','cyan');
plot(xy_long(:,1),xy_long(:,2),'x','LineWidth',2,'Color','yellow');
plot(xy_long(:,1),xy_long(:,2),'x','LineWidth',2,'Color','red');
drawnow;
hold off

end

results:

The same process on an Image:

%# load image, process it, find edges

I = rgb2gray( imread('pillsetc.png') );
I = imcrop(I, [30 30 450 350]);
J = imfilter(I, fspecial('gaussian', [17 17], 5), 'symmetric');
BW = edge(J, 'canny');
%# Hough Transform and show matrix
[H T R] = hough(BW);
imshow(imadjust(mat2gray(H)), [], 'XData',T, 'YData',R, 'InitialMagnification','fit')
xlabel('\theta (degrees)'), ylabel('\rho')
axis on, axis normal, hold on
colormap(hot), colorbar
%# detect peaks
P = houghpeaks(H, 4);
plot(T(P(:,2)), R(P(:,1)), 'gs', 'LineWidth',2);
%# detect lines and overlay on top of image
lines = houghlines(BW, T, R, P);
figure, imshow(I), hold on

for k = 1:length(lines)
xy = [lines(k).point1; lines(k).point2];
plot(xy(:,1), xy(:,2), 'g.-', 'LineWidth',2);
end
hold off

Video - Boundary Tracing


The MATLAB toolbox includes two functions you can use to find the boundaries of objects in a binary image:
  • bwtraceboundary
  • bwboundaries
The bwtraceboundary function returns the row and column coordinates of all the pixels on the border of an object in an image. You must specify the location of a border pixel on the object as the starting point for the trace.
The bwboundaries function returns the row and column coordinates of border pixels of all the objects in an image. For both functions, the nonzero pixels in the binary image belong to an object and pixels with the value 0 (zero) constitute the background.

The code:

clear all
close all
clc;
disp('Testing Purposes Only....');
%fin = 'sampleVideo.avi';
fin = 'smallVersion2.avi';
fout = 'test2.avi';
avi = aviread(fin);


% Convert to RGB to GRAY SCALE image.
avi = aviread(fin);
pixels = double(cat(4,avi(1:2:end).cdata))/255; %get all pixels (normalize)

nFrames = size(pixels,4); %get number of frames
for f = 1:nFrames
pixel(:,:,f) = (rgb2gray(pixels(:,:,:,f))); %convert images to gray scale
end
rows=128;
cols=160;
nrames=f;
for l = 2:nrames

%edge detection
edgeD(:,:,l) = edge(pixel(:,:,l),'canny');
g(:,:,l) = double(edgeD(:,:,l));

%subtract background
d(:,:,l)=(abs(pixel(:,:,l)-pixel(:,:,l-1))); %subtract current pixel from previous

%convert to binary image
k=d(:,:,l);
bw(:,:,l) = im2bw(k, .2);
bw1=bwlabel(bw(:,:,l));

%By default, bwboundaries finds the boundaries of all objects in an image
BW_filled = imfill(bw(:,:,l),'holes');
boundaries = bwboundaries(BW_filled);

imshow(pixel(:,:,l));

hold on
for k=1:10
b = boundaries{k};
plot(b(:,2),b(:,1),'g','LineWidth',3);
end
drawnow;
hold off

end

Results:

Monday, February 22, 2010

Merge a sequence of video images to another (red Channel)

Combining 2 different sequence of images into one via a red channel for distinction.

The results:


The Code:


clear all
close all
clc;
disp('Testing Purposes Only....');
fin = 'smallVersion.avi';
fout = 'bgSubtract1.avi';
avi = aviread(fin);

% Convert to RGB to GRAY SCALE image.
avi = aviread(fin);
pixels = double(cat(4,avi(1:2:end).cdata))/255; %get all pixels (normalize)
nFrames = size(pixels,4); %get number of frames

for f = 1:nFrames
pixel(:,:,f) = (rgb2gray(pixels(:,:,:,f))); %convert images to gray scale
end

nrames=f;
for l = 2:nrames
d(:,:,l)=(abs(pixel(:,:,l)-pixel(:,:,1))); %subtract current pixel from background
z(:,:,l)=(abs(pixel(:,:,l)-pixel(:,:,l-1))); %subtract current pixel from previous


%-------seperate channel
I =z(:,:,l);
rz = cat(3,I,I,I);
for i=1:128 %video size
for j=1:160 %video size
if rz(i,j,1) > 0.2 %theshold
rz(i,j,1) = 1; %red channel
else
rz(i,j,1) = 0;
end
rz(i,j,2) = 0; %green channel
rz(i,j,3) = 0; %Blue Channel
end
end

%------merge
fg= rz;
bg= cat(3,pixels(:,:,l),pixels(:,:,l),pixels(:,:,l)); %array of 3
coef = 0.6;
dif = fg-bg;

out = bg + coef.*dif;

imshow(out);
%-----
drawnow;
%hold off

end

Merge a sequence of video images to another

In motion detection you would want to combine your video to the original video. to do this, you combine your original video with the processed video.

the code:

clear all
close all

clc;

disp('Testing Purposes Only....');

fin = 'sampleVideo.avi';

avi = aviread(fin);
% Convert to RGB to GRAY SCALE image.

avi = aviread(fin);
pixels = double(cat(4,avi(1:2:end).cdata))/255; %get all pixels (normalize)
nFrames = size(pixels,4);
%get number of frames


for f = 1:nFrames
pixel(:,:,f) = (rgb2gray(pixels(:,:,:,f))); %convert images to gray scale

end


nrames=f;
for l = 2:nrames
d(:,:,l)=(abs(pixel(:,:,l)-pixel(:,:,1))); %subtract current pixel from background

z(:,:,l)=(abs(pixel(:,:,l)-pixel(:,:,l-1))); %subtract current pixel from previous


%------merge
fg= pixel(:,:,l); %foreground
bg= z(:,:,l); %background

alpha= 0.1;
%alpha
dif = fg-bg;

out = bg + alpha.*dif;

imshow(out);

%--------
drawnow;
end


Results:

Motion Detection - background image subtraction

One of the most common approaches is to compare the current frame with the previous one. It's useful in video compression when you need to estimate changes and to write only the changes, not the whole frame. But it is not the best one for motion detection applications.

here the process i used:

  1. get each frames pixel and normalize to 255
  2. Convert it to gray scale
  3. subtract pixels from previous pixels (previous post subtracted images)
  4. show each image in a sequence

heres the code:

clear all
close all
clc;
disp('Testing Purposes Only....');
fin = 'smallVersion.avi';
avi = aviread(fin);

% Convert to RGB to GRAY SCALE image.
avi = aviread(fin);
pixels = double(cat(4,avi(1:2:end).cdata))/255; %get all pixels (normalize)
nFrames = size(pixels,4); %get number of frames

for f = 1:nFrames
pixel(:,:,f) = (rgb2gray(pixels(:,:,:,f))); %convert images to gray scale
end

nrames=f;
for l = 2:nrames
%d(:,:,l)=(abs(pixel(:,:,l)-pixel(:,:,1))); %subtract current pixel from background
z(:,:,l)=(abs(pixel(:,:,l)-pixel(:,:,l-1))); %subtract current pixel from previous pixel

%imshow(d(:,:,l));
imshow(z(:,:,l));

hold on
drawnow;
hold off

end

Results:

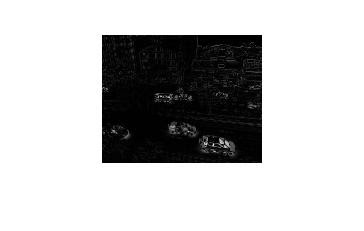
Image 1: Frame subtracted from Background or first frame (overlaps)

Image 2: Frame subtracted from previous Frame

Video - Motion Detection

There are many approaches for motion detection in a continuous video stream. All of them are based on comparing of the current video frame with one from the previous frames or with something that we'll call background.

as you can see from my implementation, the results are not very promising, because of the colors in the video stream. the next approach is using image and converting to gray scale.

here the code for background subtraction using video frames:

clear all
close all

clc;

disp('Testing Purposes Only....');

fin = 'sampleVideo.avi';

fout = 'test2.avi';

fileinfo = aviinfo(fin);
nframes = fileinfo.NumFrames;

aviobj = avifile(fout, 'compression', 'none', 'fps',fileinfo.FramesPerSecond);
for i = 2:nframes %1

%Read frames from input video

mov_in = aviread(fin,i);
im_in = frame2im(mov_in);

%Do processing on each frame of the video

%----------------------------------------------------------------------

mov_in2 = aviread(fin,i-1); %or 1 for the first frame
im_in2 = frame2im(mov_in2);

background = imopen(im_in2,strel('disk',15)); %get the background image
I2= imsubtract(im_in,background);

im_out =I2;

%----------------------------------------------------------------------
%Write frames to output video
frm = im2frame(im_out);
aviobj = addframe(aviobj,frm);
%i %Just to display frame number

end;

%Don't forget to close output file
aviobj = close(aviobj);

msgbox('DONE');

return;


results:

Video Editting using Image Frames

one easy way for image processing and adding extra images is:
  1. read each frame of the video
  2. perform image analysis
  3. show the image and hold
  4. add additional and stop hold
  5. continue drawing the image

this way youll see the images drawn on screen in a sequence that represents a video. the next stop is exporting it back to video. here is the structure im using:

clear all
close all
clc;
disp('Testing Purposes Only....');
fin = 'sampleVideo.avi';
fout = 'test2.avi';
avi = aviread(fin);

%view output frame by frame in an image
video = {avi.cdata};
for a = 1:length(video)

%---------------------------------
%Do image processing

newImage = rgb2gray(video{a});
%---------------------------------

imshow(newImage); %or use imagesc
axis image off
hold on

%---------------------------------
%add tracing to image
rectangle('Position',[50 50 70 100],'EdgeColor','r');
%---------------------------------

drawnow;
hold off
end;

Sunday, February 21, 2010

Video Predifined Filtering

The fspecial function produces several kinds of predefined filters, in the form of correlation kernels. After creating a filter with fspecial, you can apply it directly to your image data using imfilter. This example illustrates applying an unsharp masking filter to an intensity image. The unsharp masking filter has the effect of making edges and fine detail in the image more crisp.

I = imread('moon.tif');
h = fspecial('unsharp');
I2 = imfilter(I,h);
imshow(I), title('Original Image')
figure, imshow(I2), title('Filtered Image')


In Video:

fin = 'rawVideo.avi';
fout = 'test.avi';
fileinfo = aviinfo(fin);
nframes = fileinfo.NumFrames;
aviobj = avifile(fout, 'compression', 'none', 'fps',fileinfo.FramesPerSecond);
for i = 1:20
%Read frames from input video
mov_in = aviread(fin,i);
im_in = frame2im(mov_in);
%Do processing on each frame of the video
%----------------------------------------------------------------------
%In this example - Predefined Filters
h= fspecial('unsharp');
im_out = imfilter(im_in,h);
%----------------------------------------------------------------------
%Write frames to output video
frm = im2frame(im_out);
aviobj = addframe(aviobj,frm);
%i %Just to display frame number
end;
%Don't forget to close output file
aviobj = close(aviobj);

msgbox('DONE');
return;

Results:

Video Linear Filtering

Filtering is a technique for modifying or enhancing an image. For example, you can filter an image to emphasize certain features or remove other features.

Filtering is a neighborhood operation, in which the value of any given pixel in the output image is determined by applying some algorithm to the values of the pixels in the neighborhood of the corresponding input pixel. A pixel’s neighborhood is some set of pixels, defined by their locations relative to that pixel.

Linear filtering is filtering in which the value of an output pixel is a linear combination of the values of the pixels in the input pixel’s neighborhood.

Linear filtering of an image is accomplished through an operation called convolution. In convolution, the value of an output pixel is computed as a weighted sum of neighboring pixels. The matrix of weights is called the convolution kernel, also known as the filter.

Image processing operations implemented with convolution include smoothing, sharpening, and edge enhancement.


The operation called correlation is closely related to convolution. In correlation, the value of an output pixel is also computed as a weighted sum of neighboring pixels. The difference is that the matrix of weights, in this case called the correlation kernel, is not rotated during the computation.

Both can be performed using the toolbox function imfilter. This example filters an image with a
5-by-5 filter containing equal weights. Such a filter is often called an averaging filter.

I = imread('coins.png');
h = ones(5,5) / 25;
I2 = imfilter(I,h);
imshow(I), title('Original Image');
figure, imshow(I2), title('Filtered Image')
In Videos:

fin = 'rawVideo.avi'; fout = 'test.avi'; fileinfo = aviinfo(fin); nframes = fileinfo.NumFrames; aviobj = avifile(fout, 'compression', 'none', 'fps',fileinfo.FramesPerSecond); for i = 1:20 %Read frames from input video mov_in = aviread(fin,i); im_in = frame2im(mov_in); %Do processing on each frame of the video
%----------------------------------------------------------------------
%In this example - Linear Filters
h = ones(5,5) / 25;
im_out = imfilter(im_in,h);

%----------------------------------------------------------------------
%Write frames to output video frm = im2frame(im_out); aviobj = addframe(aviobj,frm); %i %Just to display frame number end; %Don't forget to close output file aviobj = close(aviobj); msgbox('DONE'); return;


Results

Video Spatial Transformation - Cropping


To extract a rectangular portion of an image, use the imcrop function. imcrop accepts two primary arguments:
  • The image to be cropped
  • The coordinates of a rectangle that defines the crop area
If you call imcrop without specifying the crop rectangle, you can specify the crop rectangle interactively.
In this case, the cursor changes to crosshairs when it is over the image. Position the crosshairs over a corner of the crop region and press and hold the left mouse button. When you drag the crosshairs over the image you specify the rectangular crop region. imcrop draws a rectangle
around the area you are selecting. When you release the mouse button, imcrop creates a new image from the selected region.
In this example, you display an image and call imcrop. The imcrop function displays the image in a figure window and waits for you to draw the cropping rectangle on the image. In the figure, the rectangle you select is shown in red.

The example then calls imshow to view the cropped image.
imshow circuit.tif
I = imcrop;
imshow(I);
In Video:

fin = 'rawVideo.avi'; fout = 'test.avi'; fileinfo = aviinfo(fin); nframes = fileinfo.NumFrames; aviobj = avifile(fout, 'compression', 'none', 'fps',fileinfo.FramesPerSecond); for i = 1:20 %Read frames from input video mov_in = aviread(fin,i); im_in = frame2im(mov_in); %Do processing on each frame of the video
%----------------------------------------------------------------------
%In this example - Image Cropping
im_out = imcrop(im_in,[60 40 100 90]);
%----------------------------------------------------------------------
%Write frames to output video frm = im2frame(im_out); aviobj = addframe(aviobj,frm); %i %Just to display frame number end; %Don't forget to close output file aviobj = close(aviobj); msgbox('DONE'); return;

Result:

Video Spatial Transformation - Rotation

To rotate an image in Matlab, use the imrotate function. imrotate accepts two primary arguments:
  • The image to be rotated
  • The rotation angle

You specify the rotation angle in degrees. If you specify a positive value, imrotate rotates the image counterclockwise; if you specify a negative value, imrotate rotates the image clockwise.

This example rotates the image I 35 degrees in the counterclockwise direction.
J = imrotate(I,35);

As optional arguments to imrotate, you can also specify
  • The interpolation method
  • The size of the output image
In Video:

fin = 'rawVideo.avi';
fout = 'test.avi';
fileinfo = aviinfo(fin);
nframes = fileinfo.NumFrames;
aviobj = avifile(fout, 'compression', 'none', 'fps',fileinfo.FramesPerSecond);
for i = 1:20
%Read frames from input video
mov_in = aviread(fin,i);
im_in = frame2im(mov_in);
%Do processing on each frame of the video
%----------------------------------------------------------------------
%In this example - Image Rotation
im_out = imrotate(im_in,35);
%----------------------------------------------------------------------
%Write frames to output video
frm = im2frame(im_out);
aviobj = addframe(aviobj,frm);
%i %Just to display frame number
end;
%Don't forget to close output file
aviobj = close(aviobj);

msgbox('DONE');
return;

The Result:

Video Spatial Transformation - Interpolation

Problems arise with the resizing of video. By default, imresize uses nearest-neighbor interpolation to determine the values of pixels in the output image, but you can specify other interpolation methods.

Interpolation is the process used to estimate an image value at a location in between image pixels.

For example, if you resize an image so it contains more pixels than it did originally, the toolbox uses interpolation to determine the values for the additional pixels. The imresize and imrotate geometric functions use two-dimensional interpolation as part of the operations they perform. The improfile image analysis function also uses interpolation.

The interpolation methods all work in a fundamentally similar way. In each case, to determine the value for an interpolated pixel, they find the point in the input image that the output pixel corresponds to. They then assign a value to the output pixel by computing a weighted average of some set of pixels in the vicinity of the point. The weightings are based on the distance each pixel is from the point.

The methods differ in the set of pixels that are considered:
  • For nearest-neighbor interpolation, the output pixel is assigned the value of the pixel that the point falls within. No other pixels are considered.
  • For bilinear interpolation, the output pixel value is a weighted average of pixels in the nearest 2-by-2 neighborhood.
  • For bicubic interpolation, the output pixel value is a weighted average of pixels in the nearest 4-by-4 neighborhood.
The number of pixels considered affects the complexity of the computation. Therefore the bilinear method takes longer than nearest-neighbor interpolation, and the bicubic method takes longer than bilinear. However, the greater the number of pixels considered, the more accurate the effect is, so there is a tradeoff between processing time and quality.

Heres the list of argument values you can use:
  1. 'nearest' Nearest-neighbor interpolation (the default)
  2. 'bilinear' Bilinear interpolation
  3. 'bicubic' Bicubic interpolation

Example for Images:

I = imread('circuit.tif');
J = imresize(I ,[100 150],'bilinear');
imshow(I)
figure, imshow(J)


In Videos:

fin = 'rawVideo.avi'; fout = 'test.avi'; fileinfo = aviinfo(fin); nframes = fileinfo.NumFrames; aviobj = avifile(fout, 'compression', 'none', 'fps',fileinfo.FramesPerSecond); for i = 1:20 %Read frames from input video mov_in = aviread(fin,i); im_in = frame2im(mov_in); %Do processing on each frame of the video
%----------------------------------------------------------------------

%In this example - Image Resize
using interpolation
im_out = imresize(im_in,1.5,'nearest'); %----------------------------------------------------------------------
%Write frames to output video
frm = im2frame(im_out); aviobj = addframe(aviobj,frm); %i %Just to display frame number end; %Don't forget to close output file aviobj = close(aviobj); msgbox('DONE'); return;

the Results:


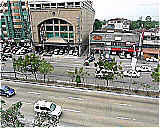
Image 1: Nearest


Image 2: Bilinear


Image 3: Bicubic

Video Spatial Transformation - Resize

To change the size of an image in Matlab, use the imresize function. Using imresize, you can
  1. Specify the size of the output image
  2. Specify the interpolation method used
  3. Specify the filter to use to prevent aliasing

For this example however i will be using the Resize to set the size of the output
Using imresize, you can specify the size of the output image in two ways:
  • By specifying the magnification factor to be used on the image
  • By specifying the dimensions of the output image

Using the Magnification Factor. To enlarge an image, specify a magnification factor greater than 1. To reduce an image, specify a magnification factor between 0 and 1.

For example, the command below increases the size of the image I by 1.25 times.
I = imread('circuit.tif');
J = imresize(I,1.25);
imshow(I);
figure, imshow(J)
The same can be done in Videos:

fin = 'rawVideo.avi'; fout = 'test.avi'; fileinfo = aviinfo(fin); nframes = fileinfo.NumFrames; aviobj = avifile(fout, 'compression', 'none', 'fps',fileinfo.FramesPerSecond); for i = 1:20 %Read frames from input video mov_in = aviread(fin,i); im_in = frame2im(mov_in); %Do processing on each frame of the video
%----------------------------------------------------------------------
%In this example - Image Resize enlarge 5 times
im_out = imresize(im_in,5);
%----------------------------------------------------------------------
%Write frames to output video frm = im2frame(im_out); aviobj = addframe(aviobj,frm); %i %Just to display frame number end; %Don't forget to close output file aviobj = close(aviobj); msgbox('DONE'); return;

The results:


Image 1: Enlarged by 5X


Image 2: Enlarged by 1.5X


Image 3: Reduced by 0.5X

Friday, February 19, 2010

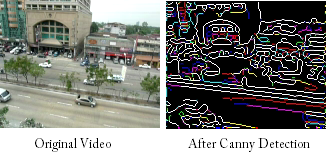
MATLAB - Canny Edge Detection


The Canny edge detection operator was developed by John F. Canny in 1986 and uses a multi-stage algorithm to detect a wide range of edges in images.

The Canny algorithm is adaptable to various environments. Its parameters allow it to be tailored to recognition of edges of differing characteristics depending on the particular requirements of a given implementation.

In Canny's original paper, the derivation of the optimal filter led to a Finite Impulse Response filter, which can be slow to compute in the spatial domain if the amount of smoothing required is important (the filter will have a large spatial support in that case). For this reason, it is often suggested to use Rachid Deriche's Infinite Impulse Response form of Canny's filter (the Canny-Deriche detector), which is recursive, and which can be computed in a short, fixed amount of time for any desired amount of smoothing.

The second form is suitable for real time implementations in FPGAs or DSPs, or very fast embedded PCs. In this context, however, the regular recursive implementation of the Canny operator does not give a good approximation of rotational symmetry and therefore gives a bias towards horizontal and vertical edges.

The Following is an implementation on a Video:

fin = 'rawVideo.avi';
fout = 'movie2.avi';
fileinfo = aviinfo(fin);
nframes = fileinfo.NumFrames;
aviobj = avifile(fout, 'compression', 'none', 'fps',fileinfo.FramesPerSecond);
for i = 1:nframes
%Read frames from input video
mov_in = aviread(fin,i);
im_in = frame2im(mov_in);
%Do processing on each frame of the video
%----------------------------------------------------------------------
%In this example - Edge detection
bw = edge( reshape(im_in, size(im_in,1), [] ) , 'canny');
im_outs=reshape(bw,size(im_in));
im_out = double(im_outs);
%----------------------------------------------------------------------
%Write frames to output video
frm = im2frame(im_out);
aviobj = addframe(aviobj,frm);
%i %Just to display frame number
end;
%Don't forget to close output file
aviobj = close(aviobj);
return;


Thursday, February 18, 2010

Matlab - My Basic Structure for Editing Videos

The Basic Strucutre i use to edit Videos. Video Editting and Video Analysis in matlab should be done the same way as Image Editting and Anlaysis however theres a slight difference when doing this in Videos;

The steps required for video editting:
  1. Identify your input Video
  2. Expound the video by assuming each frame is an Image
  3. Perform some image editting or analysis
  4. Paste all the processed Images in a single sequence
  5. Create a new Video
The following is a structure ill use throughout, Notice the "Orange" Section that will change in each implementation.

fin = 'rawVideo.avi'; %input File name to be changed
fout = 'movie2.avi'; %output File name to be changed

%get the File info
fileinfo = aviinfo(fin);
%get the number of Frames
nframes = fileinfo.NumFrames;

aviobj =
avifile(fout, 'compression', 'none', 'fps',fileinfo.FramesPerSecond);

for i = 1:nframes
%You may need to limit the nFrames, may result in a large file size
%Read frames
from input video

mov_in = aviread(fin,i);
im_in =
frame2im(mov_in);

%Do processing on each frame of the video

%TO DO.....


%Write frames to output video
frm =
im2frame(im_out);
aviobj = addframe(aviobj,frm);

i
%Just to display frame number you can ommit
end;

%Don't forget to close output file
aviobj = close(aviobj);
return;

MATLAB - Video Basics


Work in progess - TO add MORE

mov = aviread(movieFile, frameNo);


• The function aviread is used to extract a frame from the video, where movieFile is the path of the movie file and frameNo is the number of frame to be extracted.

[Img,Map] = frame2im(mov);

• The function frame2im is used to convert the frame into GRB image, where mov is the value returned by aviread and Img is the RGB image and Map is the color map.

aviinfo(mov);

• The properties of the movie file will be printed.


Common feature detectors and their classification:
Feature detectorEdgeCornerBlob
CannyX
SobelX
Harris & Stephens / PlesseyXX
SUSANXX
Shi & Tomasi
X
Level curve curvature
X
FAST
X
Laplacian of Gaussian
XX
Difference of Gaussians
XX
Determinant of Hessian
XX
MSER

X
PCBR

X
Grey-level blobs

X


Standard


NTSC


PAL


SECAM


Property


images / second


29.97


25


25


ms / image


33.37


40.0


40.0


lines / image


525


625


625


(horiz./vert.) = aspect ratio


4:3


4:3


4:3


interlace


2:1


2:1


2:1


us / line


63.56


64.00


64.00